Getting Ready for Gardening with a Greenhouse: Your Ultimate Guide!

Gardening enthusiasts often face the challenge of growing plants in unfavorable weather conditions or limited space. Thankfully, the solution lies in setting up a greenhouse—a controlled environment that allows you to extend your gardening season and cultivate a wide variety of plants. Outdoor Living Today offers a range of high-quality greenhouses that can enhance your gardening experience.

In this blog post, we will guide you through the essential steps to get ready for gardening with a greenhouse, with a special focus on incorporating Outdoor Living Today’s greenhouses into the process. Prepare to create an optimal environment for healthy and thriving plants with the help of Outdoor Living Today’s exceptional products.

1. Selecting the Right Greenhouse

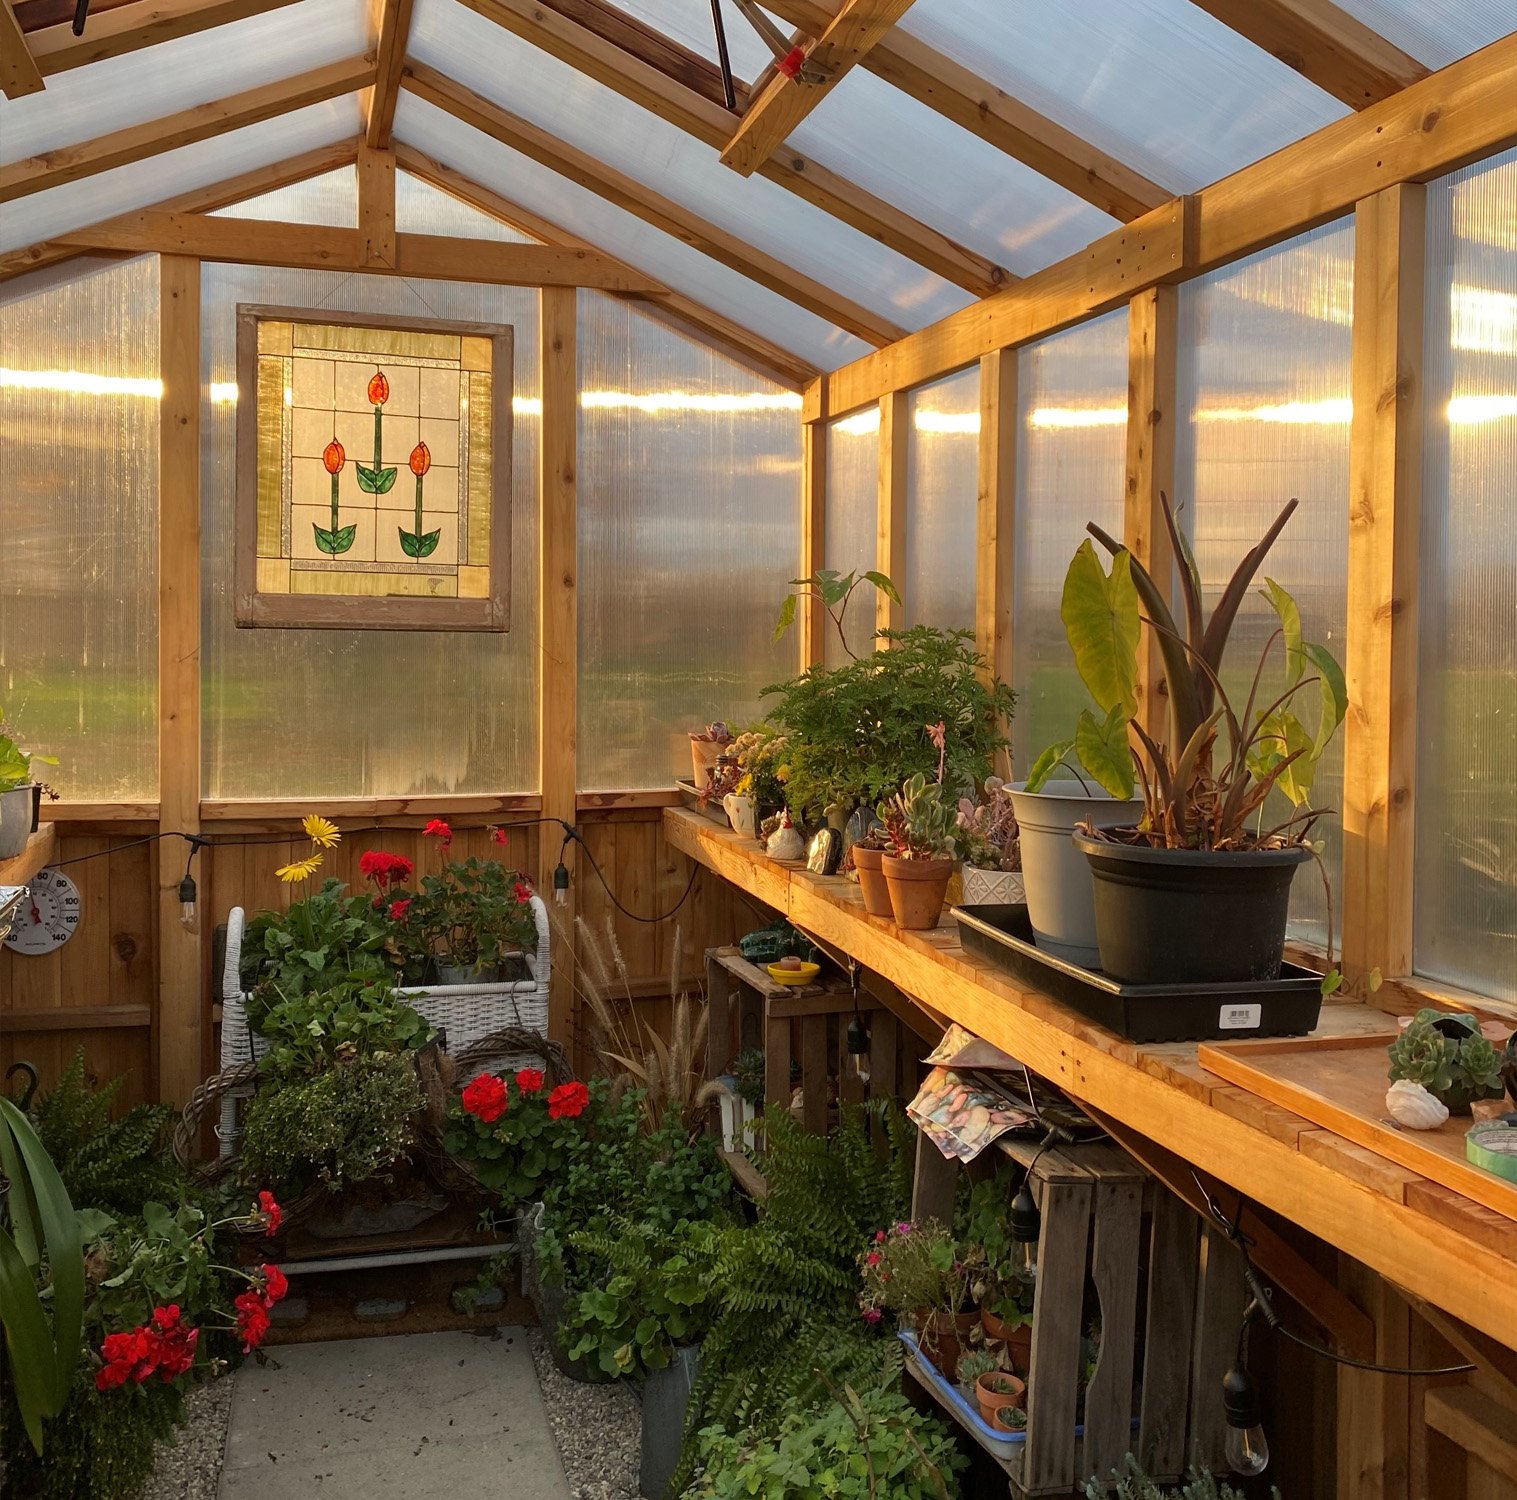
Choosing the perfect greenhouse from Outdoor Living Today’s selection is the first step. Consider the available space, budget, and the types of plants you wish to grow. Outdoor Living Today offers various sizes and styles to suit your needs from our 8×8, and 8×12 Cedar Greenhouses, to the less traditional, and more modern Sunshed Models which are available in 8×8, 8×12, 12×12, and 12×16 sizes.

2. Site Selection and Preparation

Identifying the ideal location for your Outdoor Living Today Greenhouse is crucial. Select a spot that receives maximum sunlight throughout the day, preferably facing south. Clear the area of any debris or obstacles that may hinder construction or plant growth. Ensure a level foundation and consider installing a weed barrier to prevent unwanted vegetation from encroaching on your greenhouse space.

3. Sustainability 

Western Red Cedar is a sustainable choice. It is harvested from responsibly managed forests in Canada and the United States, which means that the production process has a lower environmental impact than other materials. This is because the forests are carefully monitored and replanted, ensuring that the ecosystem is protected for future generations.

4. Climate Control and Ventilation

Maintaining optimal temperature and ventilation is vital for successful greenhouse gardening. Outdoor Living Today’s greenhouses are designed with ventilation features, such as adjustable roof vents, allowing you to regulate temperature and humidity levels.  Adequate airflow helps prevent disease, mold, and pests while ensuring optimal plant growth.

5. Irrigation and Water Management

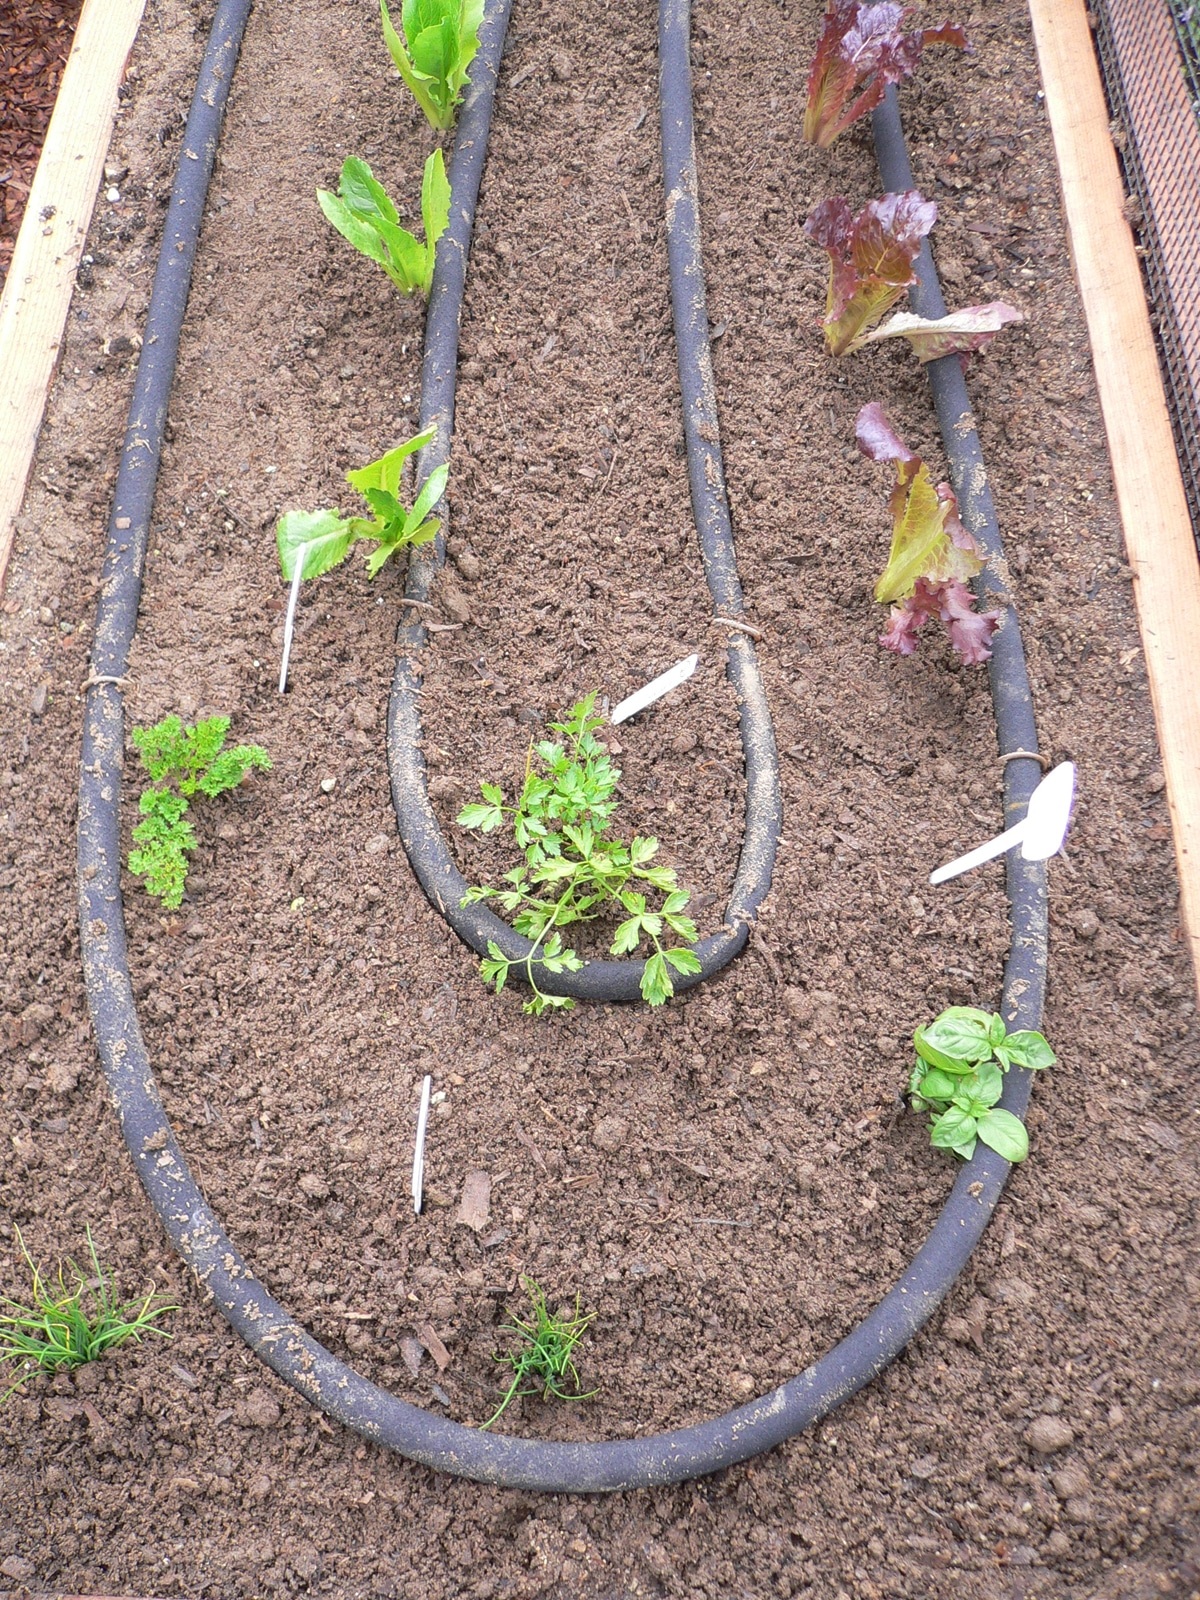
A reliable watering system is essential to keep your plants adequately hydrated. Consider installing a drip irrigation system or misting nozzles to deliver consistent moisture. Regularly monitor water levels and adjust irrigation accordingly. Rainwater collection systems, such as rain barrel kits, also offer eco-friendly and cost-effective alternatives to conventional water sources. Proper drainage is equally important to prevent excess moisture, which can lead to root rot or fungal diseases for your plants.

6. Soil and Plant Selection

Choosing the right soil and plants is crucial for greenhouse gardening success. Ensure your Outdoor Living Today greenhouse has good-quality, well-draining soil enriched with organic matter. Conduct soil tests periodically to monitor nutrient levels and pH balance. Select plants suited to the greenhouse environment, considering temperature, humidity, and light requirements. Start seeds indoors and transplant them when they are ready. Alternatively, Outdoor Living Today’s greenhouses can accommodate young plants purchased from nurseries for faster results.

Conclusion

By incorporating Outdoor Living Today’s exceptional greenhouses into your gardening endeavors, you can elevate your greenhouse gardening experience. Follow the essential steps outlined in this guide to prepare for gardening with a greenhouse, while utilizing the features and benefits offered by Outdoor Living Today’s quality products. With careful planning, proper site selection, climate control, irrigation management, and thoughtful plant choices, your Outdoor Living Today greenhouse will become a haven for healthy and flourishing plants, providing you with year-round gardening enjoyment. Happy gardening with Outdoor Living Today!

Read More

The Benefits of having an Auto Watering System

Gardening can be a rewarding and therapeutic activity, especially for those who want to control what goes into their bodies by growing their own produce. However, it requires hard work and maintenance to ensure a bountiful harvest. One of the most time-consuming and tiresome tasks is watering the garden, especially during inclement weather. This is where an Auto Watering System can be incredibly useful.

An Auto Watering System is a system that automates the watering process of your garden, removing the need to water by hand or carry buckets of water. With this system, you can lay down the hose and let the automated system handle the rest. Additionally, models like the Auto-Water System from OLT allow you to program the timer to deliver the right amount of water for optimal growth.

Aside from reducing the physical strain of watering the garden, an Auto Watering System offers several other benefits, making it a popular choice for gardeners. Firstly, it helps save on water bills by ensuring that water is delivered to the plants where it is needed most, without wastage. Secondly, it ensures even coverage and watering, reducing the risk of over-watering or under-watering. This leads to a healthier and more bountiful harvest.

Furthermore, the automatic watering system frees up time for other tasks, like removing weeds and eliminating pests. It also helps to reduce weed infestations since water is directed at the plant’s root rather than the surrounding area, where weeds usually thrive. Moreover, it helps keep nutrients in the soil by controlling water flow, preventing excess water from washing them away.

Lastly, the Auto Watering System provides greater flexibility, allowing gardeners to tend to other tasks while the system waters the garden. This is especially beneficial for those who want to maximize their gardening efforts to achieve optimal yields.

In summary, an Auto Watering System is a valuable tool for both beginner and professional gardeners. Its benefits include reducing physical strain, saving on water bills, providing even watering and coverage, reducing weed infestations, preserving soil nutrients, and providing greater flexibility. By incorporating this system into your gardening routine, you’ll be one step closer to becoming a master gardener who sees incredible results.

Auto Watering System

Read More

How to Clean and Prepare Your Yard for Spring

Now that winter has passed, it’s the perfect time to revive your garden. The best way to do this is by sprucing up your yard, including the lawn grass, shrubs, and yard trees. Here are some tips to help you get your yard looking lovely and vibrant once again:

  1. Have a Landscape Plan: Having the perfect landscape plan before you start is the best way to get what matches your lawn needs and also leaves you with a cool finish.
  2. Clean Up a Little: Start with cleaning up debris like fallen leaves, twigs, and other forms of refuse from your yard. Prepare your flower beds by weeding and removing dirt. Apply pest and weed control options and prune the shrubs.
  3. Prepare the Soil: The best way to do this is by applying fertilizer on your lawn. You should also use a pre-emergent and a weed killer, and if possible, amend the soil at this stage.
  4. Mow Pretty Early: Mowing early and often is a great way to keep the grass roots reproducing properly.
  5. Mulch It Too: Picking good and heavy mulch will be a great decision once your yard is cared for.
  6. Give Trees a Trim: Get a trimmer and prune your trees once every three years, and remember to do this at the beginning of the springtime rather than winter.
  7. Wait Until Fall to Seed: Apply fertilizer to the lawn and allow a few more weeks for the shoots to grow over brown spots. Alternatively, use sod to hide the patches.

Additional tips:

  • Have a routine cleanup
  • Use a tiller to break new lawn ground
  • Building raised beds
  • Make use of landscape berms
  • Planting rabbit-proof grass.

These simple tips will help you prepare your yard for entertaining guests, simple gardening, playing with your loved ones, and enjoying with your family.

Read More

Best Types of Insoles for Your Gardening Work Boots

Insoles are a material that sits under the foot, offering an additional layer of comfort and cushioning. While many shoes come with a standard insole, it may not be enough for workers who spend long hours on their feet, such as gardeners. In this article, we’ll provide information on what construction workers, day laborers, and gardeners should look for in insoles to meet their specific needs.

Insoles are essential to maintaining foot health and preventing injuries while working. Quality insoles not only provide comfort and safety, but they can also improve the overall work experience. For gardeners, who work in hot, humid conditions and perform physically demanding tasks like bending, digging, and weeding, insoles offer several benefits. They can counteract the negative effects of heat and moisture, correct foot and body posture, and protect against blisters and calluses.

There are different types of insoles available on the market. Support insoles offer sturdier material for comfort and stability and are suitable for gardeners of all skill levels. Comfort insoles are designed for cushioning and are better suited for lighter gardening work. Height-increasing insoles are recommended for those with chronic foot injuries or those who want to prevent certain conditions. They offer great shock absorption and can prevent pains in the knees, back, and pelvis area. Memory foam insoles are another option that offers moisture absorption, ventilation, and support for uneven terrain.

In conclusion, insoles are a necessary addition to any work boot or shoe, especially for those performing physically intensive tasks. By selecting the right type of insole, gardeners can enjoy a more comfortable and safe working experience while preventing foot-related injuries and conditions.

Read More


Drought-Resistant Plants for an Eco-Friendly Garden

Creating an eco-friendly garden means choosing to plant drought-resistant plants that require less water, which will reduce your water bills and benefit the environment. Drought-resistant plants are not just limited to cacti. There are many flowering plants, shrubs, and perennials that have been developed to be drought resistant and will survive on rainfall after they become established. While the first year or first month may require more watering, these plants will add color to your garden after that without much effort.

To reduce water consumption, occasional deep watering is recommended rather than frequent shallow watering. Watering the plants once a week so that the soil receives an inch of water is a general rule of thumb. Watering the leaves should be avoided, and covering the soil with mulch will also help prevent water evaporation from the soil, delaying watering sessions.

Here are some drought resistant plant options for your eco-friendly garden:

  • Yarrow ‘Coronation Gold’: Golden yellow flowers bloom among tall, silvery gray leaves. The plants require direct sunlight and soil with proper drainage capabilities.
  • Silver Artemisias: This silvery gray leafy plant adds fragrance to your garden. The plants thrive in direct sunlight and well-drained soil, but can be invasive and need to be divided often to limit their spread.
  • Purple Coneflower: This plant prefers direct sunlight and well-drained soil and grows up to 4 feet in height.
  • Tall Bearded Iris: This plant requires direct exposure to sunlight and well-drained soil. It blooms in spring and grows to over 2 feet in height.
  • Rosemary: A hardy plant that produces both flowers and aromatic leaves. It requires less water and grows well in well-drained soil.
  • Common Thyme: This garden plant blooms in late spring and early summer and can grow in either direct sunlight or lightly shaded areas.
  • Lavender: These mounding plants flower in the summer and grow to between 2 and 3 feet in height.
  • Common Sage: The woolly gray-green leaves of this plant make them attractive throughout the growing season. It prefers direct sunlight and well-drained soil.
  • Hens and Chicks: A succulent plant with blue-green leaves that are tipped with red or purple highlights in the summer. It should be placed in direct sunlight or lightly shaded locations and the soil should not be flooded.
  • Snow-in-Summer: A very short plant with silvery leaves and star-shaped white flowers that thrives in direct sunlight and soil that does not hold water for extended periods of time.
  • Creeping Phlox: A hardy plant that grows in fertile soil that is well-drained. It blooms in late spring or early summer and can make attractive borders.
  • Sedum: A short plant with fleshy evergreen leaves that grows well in average or fertile soil and requires direct sunlight. It flowers in summer and produces loose clusters of purple or white flowers.

In addition to planting drought-resistant plants, conserving water by storing rainwater in barrels and using mulch to help the soil retain moisture for a longer period of time can make your garden even more eco-friendly.

These steps will ensure that your garden remains lush and enticing without consuming a lot of precious water during the dry months.

Read More

Introducing Gardening to your Children

As a passionate gardener, you may want to introduce your children to the joys of gardening. Not only does gardening teach children valuable skills such as patience, discipline, persistence, and a love for nature, it can also provide an opportunity for them to learn basic skills and experience the joys of manual labor. Moreover, even picky eaters are likely to eat cherry tomatoes and kale that they have helped to grow.

However, when introducing children to gardening, it is important to consider their age. Younger children tend to be impatient and require quick results, so starting with quick-growing plants such as sunflowers and tomatoes can be helpful. Additionally, allowing children to have their own individual plots can give them a sense of ownership, and responsibility, and encourage them to remember to water and weed their gardens.

It’s important to ensure safety measures are in place when involving children in gardening activities. This includes providing proper gardening tools that are the right size for children to use safely, keeping children away from chemical fertilizers and pesticides, and monitoring them closely. When planning garden beds, it’s important to make sure that they are not too wide and to leave enough space between the beds for children to move around with ease.

Using the garden as a teaching tool can be an effective way to engage children in gardening activities. Encourage children to explore all aspects of the garden, including the insects, small animals, and birds that are part of it. Letting children choose what they want to plant and allowing them to make a few mistakes can also be beneficial.

Finally, it’s important to be flexible and allow children to experiment and make mistakes so that they can appreciate the joys of gardening and learn important life lessons. By following these tips, you can introduce your children to gardening and help them develop a lifelong love of nature.

Read More

The great outdoors beckons you and in this article you will find backyard decorating ideas on a budget! Even if we are strapped for money, most of us try to transform our backyards into a paradise where we can rest, relax, and rejuvenate in the company of our loved ones and friends. The yearning to transform the outdoor living spaces into something lush and beautiful is very strong in homeowners, but money always poses an obstacle.

The best way to save money on doing up your outdoor living space is laboring in the backyard yourself. Even if you are new to the world of gardening, don’t worry. You can easily decorate your garden without burning a hole in your pocket.

Whether you have a sprawling backyard or a tiny one, these budget-friendly backyard decorating ideas will help you transform the space into an oasis within no time.

Listen to the Music of the Fountains

There is something magical about hearing water fall. The musical sound of water is soothing and relaxing. Why spend money on custom made fountains when you can purchase small fountain kits online or in garden supply stores?

If you want to add that water element in your garden, a fountain kit is the best option. It is not expensive and the hardware with easy-to-follow instructions is part and parcel of the kit. To create a focal point, position the fountain in the center of your garden. You also can place it in an area that is surrounded by vibrantly colored flowers.

Upcycle Old Car Tires

Most homes will have a few car tires lying around in their garage. Instead of letting the tires occupy valuable space in your garage and making it look untidy and disorganized, use the tires to create unique and beautiful planters.

Backyard Decorating Ideas on a Budget

Position the tires on top of the other. Stop at two tires. Now fill the center with potting soil and plant inexpensive flowers, such as geraniums and marigold. You can paint the tires in vibrant colors and if you or any other family member is artistically inclined, let them go berserk with the tires. Make sure you place the tire planters strategically to showcase the unique planters and also enhance the look of your garden.

Rock Your World with a Rock Garden

Traditionally, rock gardens are inspired by Zen gardens, but you don’t have to follow this trend if you don’t want to. Select a shaded area in the garden to create your unique rock garden.

Buy plenty of gravel bags from the local garden store and cover the selected spot with gravel. Look around your yard for large rocks. If you can’t find any, ask friends and family for rocks. Use the rocks to create a pattern around the gravel and place a few smaller rocks strategically on the gravel. All the succulent plants you have, the ones in small pots, place them in a decorative manner on the gravel. And, your budget rock garden is done!

Light Up Your Backyard

There is nothing more soothing and relaxing than lounging in your backyard in the evening. But the darkness may prevent you. You can instantly create a magical fairyland with your pots and planters. Here’s how to do it.

Paint the pots and planters with glow-in-the-dark paint and before you know it these will softly illuminate your backyard without causing your electricity bill to skyrocket!

Create an Entertainment Space

You don’t have to spend a lot of money to create a space in your backyard for family and friends. Invest in an affordable DIY pergola kit and you have a space to host barbecues, birthday parties, and cocktail evenings for family and friends. It also creates a focal point in the garden that you can decorate with flowering potted plants and outdoor furniture.

Backyard Decorating Ideas on a Budget

Make sure you opt for 100 percent Western Red Cedar pergola kit, as it is renowned for its durability, natural resistance to pests, beauty, and strength. The kit comes with the necessary hardware and illustrated instructions that are easy to follow. Above all, the cedar pieces are precut, so you just need to follow the instructions to erect your very own pergola.

Bottle Up the Flower Beds

Forget about using bricks to create borders for your flowerbeds. Keep those colored bottles until you have a whole stack of them. You will need them to make a creative and colorful border for your flowerbeds.

Plant the bottles upside down around the flowerbed to create a unique border. Not only will it demarcate the flowerbeds, the colors will make your garden stand out. Truly ingenious and creative!

These are some budget-friendly ways to decorate your garden and extend your living space. You don’t need to spend a lot of money to create a beautiful and unique garden. Look for things in your home that you can re-purpose and use in the garden. It is a fantastic way to let your personality shine through your garden and also reduce the burden on landfills by up-cycling items from your home that you no longer use or want.

Backyard Decorating Ideas on a Budget

Read More

While spring is the time to plant new plants and seedlings and summer the right time to watch them grow, your garden needs care during fall as well. Here are some Essential Steps to Prepare Your Garden for Autumn. As the weather cools the plants mature and move towards hibernating during winter. However, preparing your garden during the fall will make your spring garden much better.

Examine the Garden

To prepare your garden for fall, first walk around it and examine it with care. Look for bald patches of soil that require soil amendments, over grown plants that need to be divided, note down which bulbs need to be removed before winter, and which herbs need to be moved indoors.

Add Soil Amendments

Fall is the best time to add soil amendments as the slow releasing fertilizer will enhance soil quality throughout the winter months. During spring and summer, the nutrients in the soil are depleted by the growing plants. Add soil amendments and turn them into the soil using a gardening fork. Ensure that you cover all areas where there are no plants either because you have removed spring and summer flowers, or bulbs, or because some plants did not thrive during the growing season.

While chemical fertilizers work for feeding the plant directly, organic fertilizer works by enriching the soil. Mulch, manure, and compost are all organic fertilizers that release nutrients slowly into the soil. By working them into the soil in fall, you will reduce the number of gardening chores you have to perform in spring.

When it comes to a large patch of ground such as a kitchen garden, you should begin by first tilling and soil and removing roots and weeds. Next add the mulch or soil amendment to the soil and till it again, working the nutrients into the soil. This step is easier to perform in fall before the ground becomes hard during winter frost or soggy after the spring thaw. The soil is also warmer, letting the microorganisms thrive. By tilling the soil in fall, you will be introducing oxygen into the soil when it is still warm, ensuring a healthier soil for spring planting.

Remove Herbs Indoors

Remove potted herbs indoors before the weather becomes cooler and you will be able to enjoy fresh herbs for a longer period of time. Simply move the pots to a warm corner of the porch that gets some sunlight and is not exposed to the snow or frost.

Apply Weed Killer on the Lawn

Most gardeners recommend that weed killer be applied twice on the lawn each year. In fall you need to apply weed killer to get rid of the seeds that have landed in the summer. This will mean the emergence of fewer weeds in the spring when the lawn revives.

If you have pets be careful how you distribute the poison. You may want to keep your dog(s) inside your home for a couple or hours to allow the poison to penetrate the weeds before you allow your dog to run around in your backyard. If you are only worried about weeds in your front lawn then you should not have too much to worry about. While the poison is being absorbed by the weeds, you can walk your dog during this time so they are not too restless inside your home waiting for the poison to seep inside the plant.

Collect Seeds

If you have been growing heirloom plants from seeds, fall is the time to collect seeds from both flowering and kitchen garden plants. For this you need to avoid harvesting a few fruits and flowers and instead let them ripen or dry out on the plant. Fruits that over ripen on the plant will have mature seeds that can be collected by soaking the fruit in water and removing the pulp.

The weaker seeds will float to the top and can be discarded and the heavier seeds collected and dried before being labeled and stored in a clean, cool, and dry environment.

Empty the Rain Water Barrel

If you have been collecting rain water in a barrel for your gardening needs, you need to drain it completely before the onset of the first frost. Drain the barrel and clean it after removing pipes and tubes. This will reduce the chances of damaging it by frozen water.

Remove Mulch from Stems and Trunks

As you go around your garden in fall, remove mulch from stems and trunks of trees and perennial shrubs. This will help prevent the formation of mold or mildew as there is no moisture trap on the shrubs.

Examine Perennials

You should also examine all the perennials in your garden for signs of disease. Look for spotted leaves or rotting stems and either apply treatment, prune the branch, or remove the plant before the disease spreads to healthy plants in the vicinity.

Check Trees for Damaged Branches

To make sure that people and property are not damaged by rotting branches, check all of them for signs of damaged branches. This is easier in fall when some of the trees shed their leaves, leaving the branches bare and easier to inspect. If you spot signs of danger, get the branches removed.


These essential steps to prepare your garden for Autumn can help you have a better garden in spring and summer. Many of the fall garden chores will ensure that the soil is healthy and ready for spring planting. By doing this you will be able to plant your spring crops after minimal soil preparation, getting a head start on your fantastic and enlightening garden.

Essential Steps to Prepare Your Garden for Autumn

Read More

Get your garden shed ready for winter! A garden shed is no longer a luxury. It is a necessity that allows you to enjoy more storage space for your gardening tools and implements rather than using your garage for storage. You can easily invest in a panelized garden shed that you can erect yourself. Not only is such a shed aesthetically pleasing, it also is quite functional.

DIY panelized garden sheds come with pre-cut panels that already have Western Red Cedar shingles attached to the roof panels. Each panel comes in a manageable size, so that it is quick and easy to assemble the shed. You also have the flexibility to choose a window and door panel placement.


However, once you have your garden shed in place, it is very easy to let it turn into a huge mess. You may end up just throwing everything into the shed and forgetting about it until the need arises. Then it is one big clutter that you have to weed through to find what you need. Don’t let your garden shed fall into this state. Work on it now to prepare your shed for winter and beyond.

Clean and Sweep

Take out everything from the shed and keep it outside. Then sweep the shed to catch all the dirt and debris. Wash and rinse pots, wheelbarrow, shovels and other gardening tools and implements. Use a wire brush to get rid of stubborn soil stuck to the surface. Let the tools, air dry. Once they are thoroughly dry, store them away until you need them again. You can spray the metal parts of the tools with a lubricant to prevent rust formation.

Spruce Up the Shed

If you install a garden shed made from pre-cut Western Red Cedar, you don’t really need to paint it. This wood looks beautiful naturally and has its own charm. However, you can stain the floor of your shed, if it is made from wood. Use a weatherproof stain to keep the floor looking gorgeous all year long.

Also, check for holes and cracks in the panels. If you find them, use caulk to fill them up. You also can fill the seams with caulk to keep the cold wind out and prevent your shed from smelling musty when you don’t open it for days in winter.

Keep Pests at Bay

Garden sheds seem to attract pests very easily. Bugs and rodents love to make homes in garden sheds. These critters can create a mess and stink up your shed. So set traps throughout the year to deter these pests and ensure your garden shed lasts for decades and also remains in a magnificent shape.

Organize and Store

Check all the items that you store in your garden shed. Discard anything that is broken and you no longer need. Garden sheds can accumulate a lot of clutter every season and you may not even realize it until you are trying to find that one tool or implement that is hidden under the chaos.

Once you have got rid of unwanted and broken items, it is time to focus on the storage. The best way to optimize storage in your garden shed is with shelves and hooks. Fix large hooks on the inside wall to hang large tools and implements, such as shovels, trowels, and rakes. You can even roll up the garden hose and hang it on the wall, thereby using the space vertically inside the shed.

It is important to use shelf space prudently. Anything that is small and organic, such as mulch or dirt should first go into waterproof packaging and then onto the shelf. This will prevent the shed’s floor from damage. Similarly, pots, watering cans, fertilizer, and herbicides should also go onto a shelf. Make sure you label the shelf, so that you know what goes where. Place other small items in transparent plastic boxes with lids. Label the boxes on all sides, so that you know what they are for.


Place these in a systematic manner on the shelves. Boxes that hold items you need regularly for your garden maintenance and upkeep should be placed on lower shelves, while those you use sparingly or rarely should be placed on higher shelves.

Your wheelbarrow should be propped up against the wall, so that it is not in the way when you enter the shed. The things that you own can be a nuisance if they are constantly getting in the way and so on.

Neaten the Outside

Clear grass, shrubs, and other plants growing along the garden shed. They can damage lower half of the shed. You should be looking to keep about 3 to 5 (7.62 to 12.7 cm) inches of space between the garden shed and your plants to prevent damage to the lower part of the shed and its base.

A garden is a green oasis in a concrete jungle and a garden shed allows you to keep that oasis beautiful and well-landscaped. So, organize and clean up your shed to store all the valuable gardening implements and tools that you need to make your garden into a haven. It is worth the effort and time!

Read More

Now that you are going to stow away your mower in the shed for winter, this is a good time to pick the best vegetables to grow and pack your vegetable beds so that you have a nice little harvest in the winter months. When you keep your garden going through the chilly months, you get to spend time outside in the fresh air, exercise and can give you some miraculous home-grown produce.

Up until October end, you can sow a good range as a supplement for the sprouts, parsnips, and leeks that should already be settled in. Here is a look at the top 10 best vegetables to grow  in the winter:

  1. Broad Beans: Autumn is always a great time to sow broad beans. This veggie keeps nutrients from leaching through what is otherwise fallow soil, causing its structure to deteriorate. These beans are ready a month earlier than the ones you sow in April, and they also do not get black fly. Good broad bean varieties for autumn are Super Aquadulce and Aquadulce Claudia (AGM). And this is much healthier eating compared to Skittles and potato chips.
  2. Asparagus: Nowadays, you will find asparagus varieties that you can plant in autumn, which is fantastic as it helps them establish much quicker. Although many people think that asparagus beds take a lot of hard work, if you can get the bed free of weeds, they take a lot less work than annual vegetables. It will take you two years before they can be cut, but this is a small price to pay for a gourmet wonder. It is much healthier than loading up on fried chicken all winter and swallowing cans of soda which is also terrible for your teeth. It is easy to gain weight in the winter, if you play it smart that will not happen to you and you will even save yourself a trip to the dentist.
  3. Peas and Pea Shoots: If you want a late spring crop, it is a fabulous idea to start sowing seeds now, especially if you live in a mild area. If you sow direct into the ground, make sure that you plant them one inch deep and relatively closely, roughly one inch apart. This will help in making up for a higher rate of loss. With peas, keep in mind that pea shoots taste amazing – all you need to do is pick the tips off and add them to salads and stir fries. Now you are cooking (pun intended)!
  4. Garlic: If you are looking for the easiest crop to grow, garlic is it. Plant the cloves individually 2.5 inches deep if the soil is light, and a whole lot less deep if the soil is heavy, but make sure that it is a minimum of one inch below the surface. Plant them at a distance of about one foot apart. You can choose from different varieties, like Solent Wight and Province. You can also keep the vampires away which is always a benefit!

Best Vegetables to Grow

  1. Onions, Shallots and Spring Onions: You will find many different onion varieties from sets that you can plant in now. This is actually the easiest way to grow onions, and you can harvest them earlier on in the year. For red sets, electric is good while radar is a good yellow and Shakespeare is top when it comes to white sets. Springs onions like White Lisbon Winter Hardy are an excellent choice. Shallots like Jermor are always available during this time.
  2. Lambs Lettuce: Lambs Lettuce is a good filler – it does not demand much, grows easily and useful when you need more ingredients to add to your salads. This lettuce grows well even in low temperatures, and you can sow it up until October outside. You can pick it until December or into the New Year with milder weather or with some fleece. If you have a shortage of space in your garden, you could plant a few in between your spring cabbages.
  3. Winter Lettuce: You can sow incredible varieties that are hardy, like Meraviglia d’Inverno San Martino and plant it out under a perforated polythene sheet or under fleece. In milder winters, you can leave it unprotected as soon as it establishes. An astute new variety is Winter Gem, which you can sow in a cold frame right through the winter till January.
  4. Sugarsnap Peas: Although it is not known for sowing now, choosing a variety like Snow Pea Gigante Svizzero, or Seeds of Italy, will give you slow growth over winter. This will produce a crop of small-sized edible pods earlier in the next year. Sugarsnap peas are a great choice because they taste really good, giving you that fresh pea flavor than the flavor you get when you use just the pea. Plus, they are highly versatile.
  5. Spinach: This is another popular vegetable nowadays. Pick it when it is still young and wilt the leaves instead of ruining it by overcooking it. This is a superb veggie for salads. You will find a range of useful varieties that can tolerate being sown during this time until the end of October, like Merlo Nero and Riccio d’Asti. The advantage you get from sowing in autumn is that there is no tendency to bolt.
  6. Spring Cabbage: If you look around the garden centers in your area, you may be able to find some spring cabbage plants. Plant this veggie 12 inches apart each way, while earthing up the soil around the stems so that they are protected against the cold. If you live in a place where it gets icy, cloches, or fleece will help a lot. This is a delicious vegetable that is tremendous for planting before winter actually sets in.

As you can see, there are many best vegetables to grow in winter. This means that you can still make use of your garden during the cold months and reap a fantastic harvest. There is nothing like home-grown veggies, so consider growing the ones mentioned above before winter hits home.

Best Vegetables to Grow

Read More